Creating and Configuring a Process
The "Process List" section allows viewing all business processes published in the system, flexibly configuring their display, and creating and configuring new processes of any complexity using the visual designer.
Available for users with process management permissions.
Before you begin
Process configuration and creation are performed in the control panel. Make sure you have the necessary permission:
| Who | What is needed |
|---|---|
| User with process management access | Creation/editing rights + access to the "Process List" section |
Steps Overview
- Step 1 — Open the "Process List" and configure the display
- Step 2 — Create a new process and fill in the parameters
- Step 3 — Configure the process route
- Step 4 — Fill in fields on the process steps
- Step 5 — Add fields to the process steps and configure accessibility
- Step 6 — Set additional parameters
- Step 7 — Verify and publish the process
Step 1 — Open the "Process List" and configure the display
Performed by: User with process management access
- Go to the Processes tab.
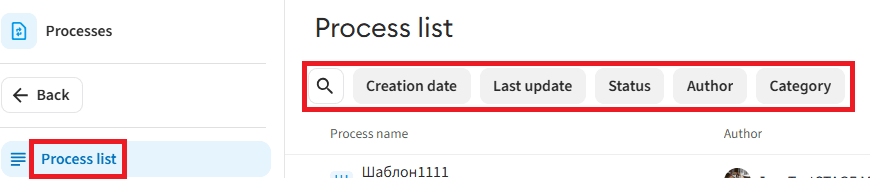
- In the side menu, select Process List — all previously published processes are displayed here.
- To configure the table layout, click the Columns button and select the parameters you want to see on the screen.
- For a quick search, enter a name or keyword in the Search field.
- For precise selection, use the available filters:
- Creation date — filtering by period or a specific process creation date.
- Last updated — filtering by period or process modification date.
- Status — filtering by process status.
- Author — filtering by one or more creators.
- Category — filtering by one or more process categories.
Step 2 — Create a new process and fill in the parameters
Performed by: User with process management access
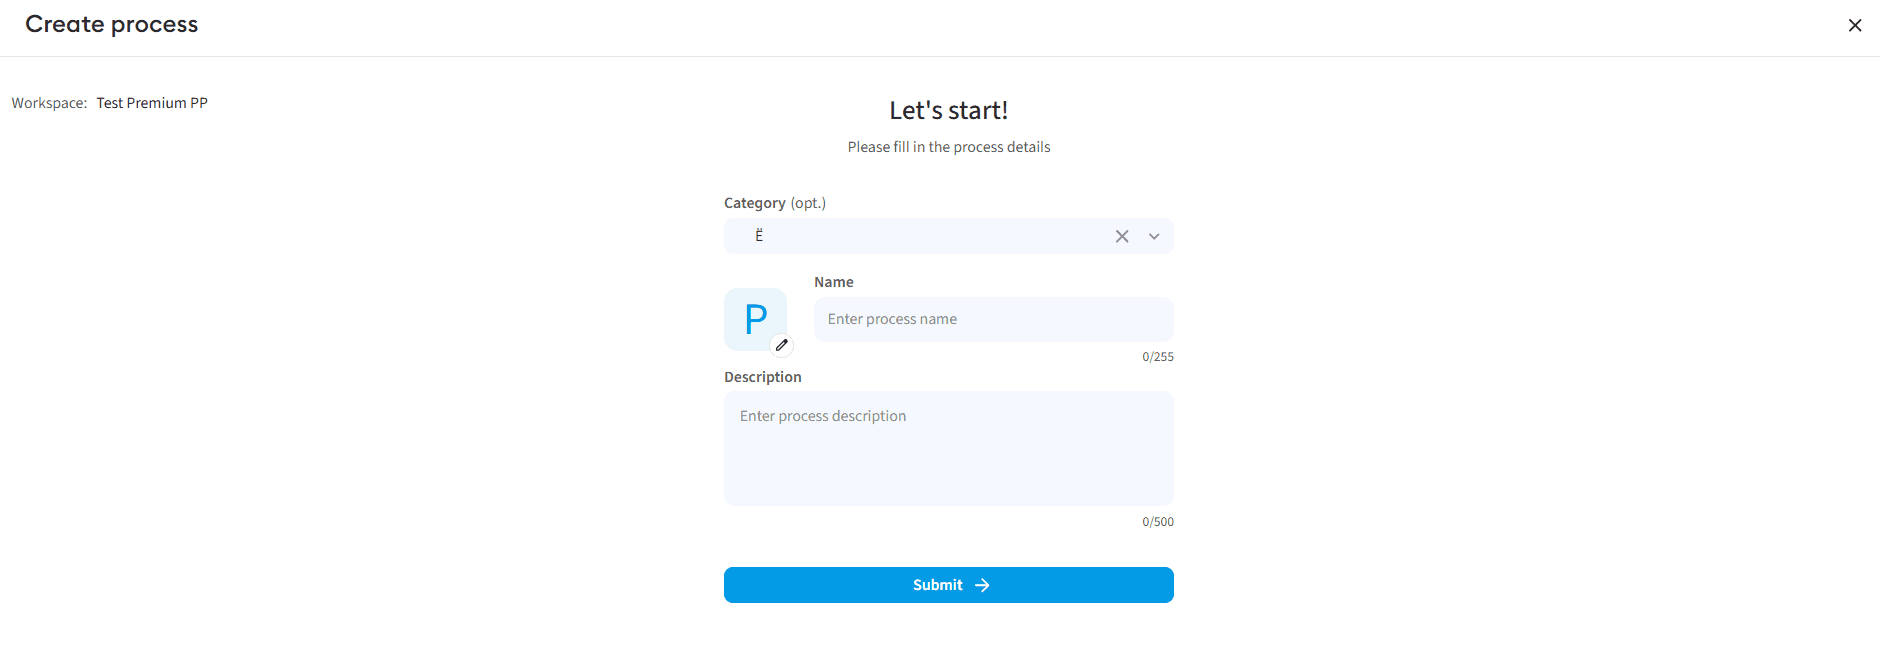
- Click the + Process button to create a process.
- In the opened "Create Process" modal window, fill in the data:
- Category — select a group for the process from the directory (optional).
- Icon and color — configure the visual style of the card (optional).
- Name — enter the process name (required field).
- Process description — add brief information about the purpose of the process.
- Click the Next button to go to the designer, or click Close to return to the list without saving the settings.
Step 3 — Configure the process route
Performed by: User with process management access
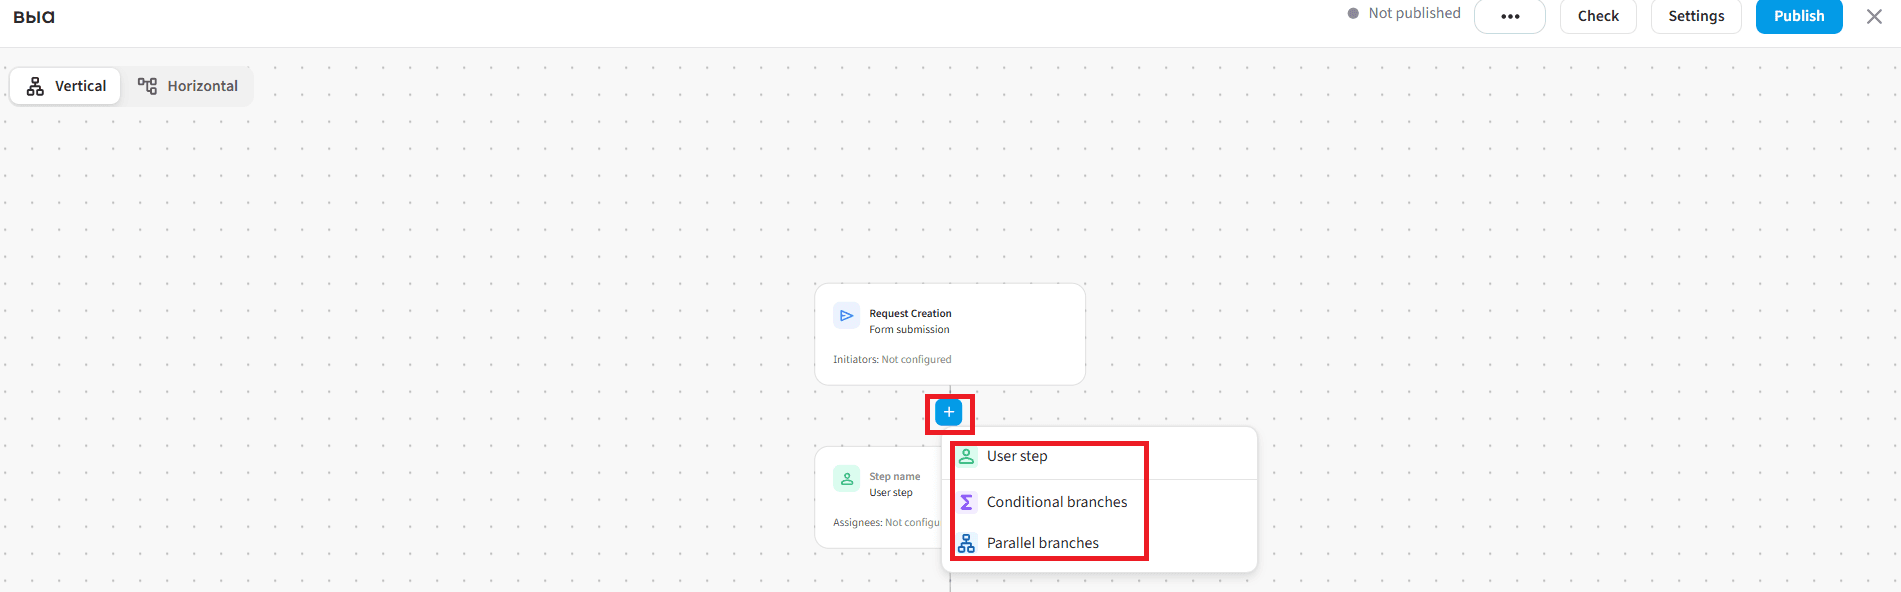
Inside the visual designer, you can build the request routing logic. To add a new stage, click the "+" button after the previous step and select the required element:
- User step — a standard stage where an employee needs to approve the request.
- Condition branches — routing branches based on the entered data (for example, if the amount exceeds a certain limit).
- Parallel branches — adding multiple steps for simultaneous parallel approval (you can add up to 5 branches).
Step 4 — Fill in fields on the process steps
Performed by: User with process management access
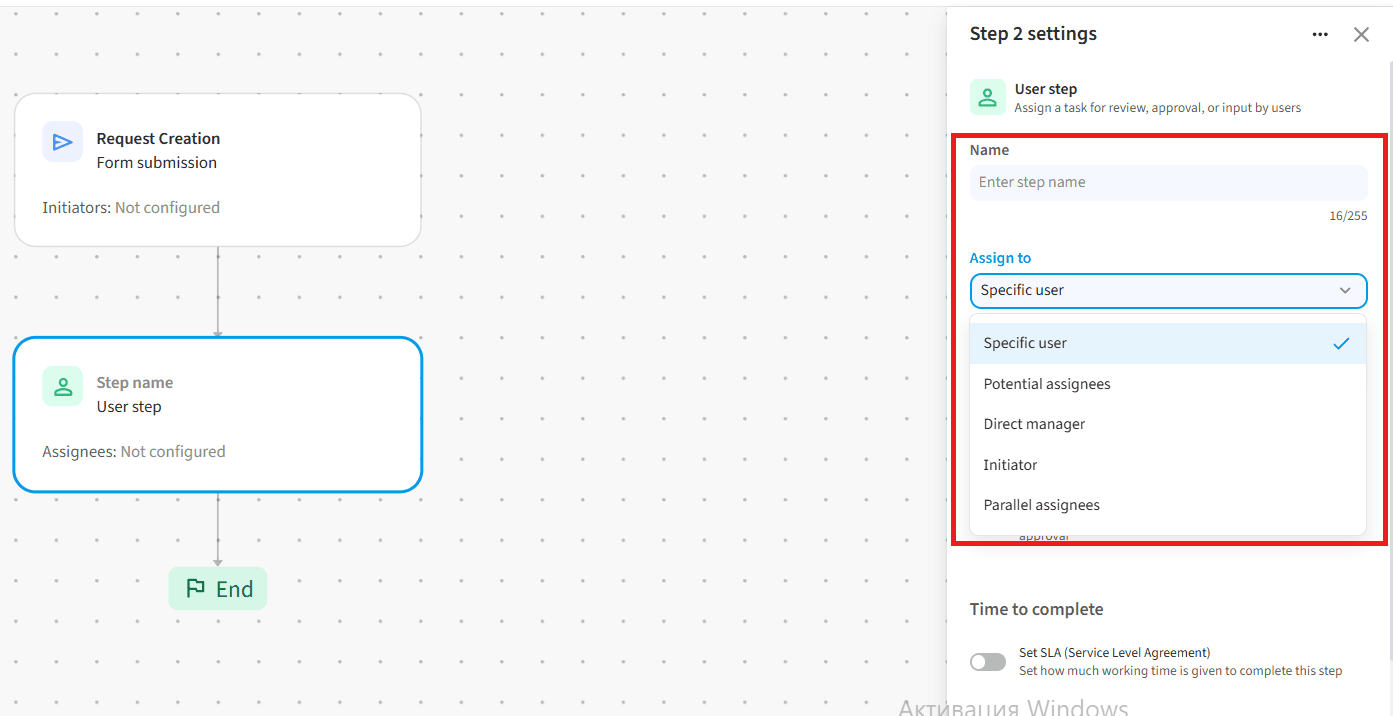
Click on any step in the diagram to open its properties and specify the parameters:
- In the Name field, enter a name for the current step.
- For the start step: in the Initiators field, add one or more users who have the right to launch this process.
- For user steps: in the Assign to field, select one of the execution types:
- Specific user — selecting one specific employee.
- Potential assignees — selecting a group of users (the task will be picked up by whoever accepts it first).
- Direct manager — the system will automatically determine the manager of the employee from the previous step.
- Initiator — the task will return to the author who launched this request.
- Parallel assignees — selecting multiple users for parallel approval.
- If you selected Specific user, Potential assignees, or Parallel assignees, make sure to fill in the Users field by selecting users from the directory.
Step 5 — Add fields to the process steps and configure accessibility
Performed by: User with process management access
5a. Adding fields
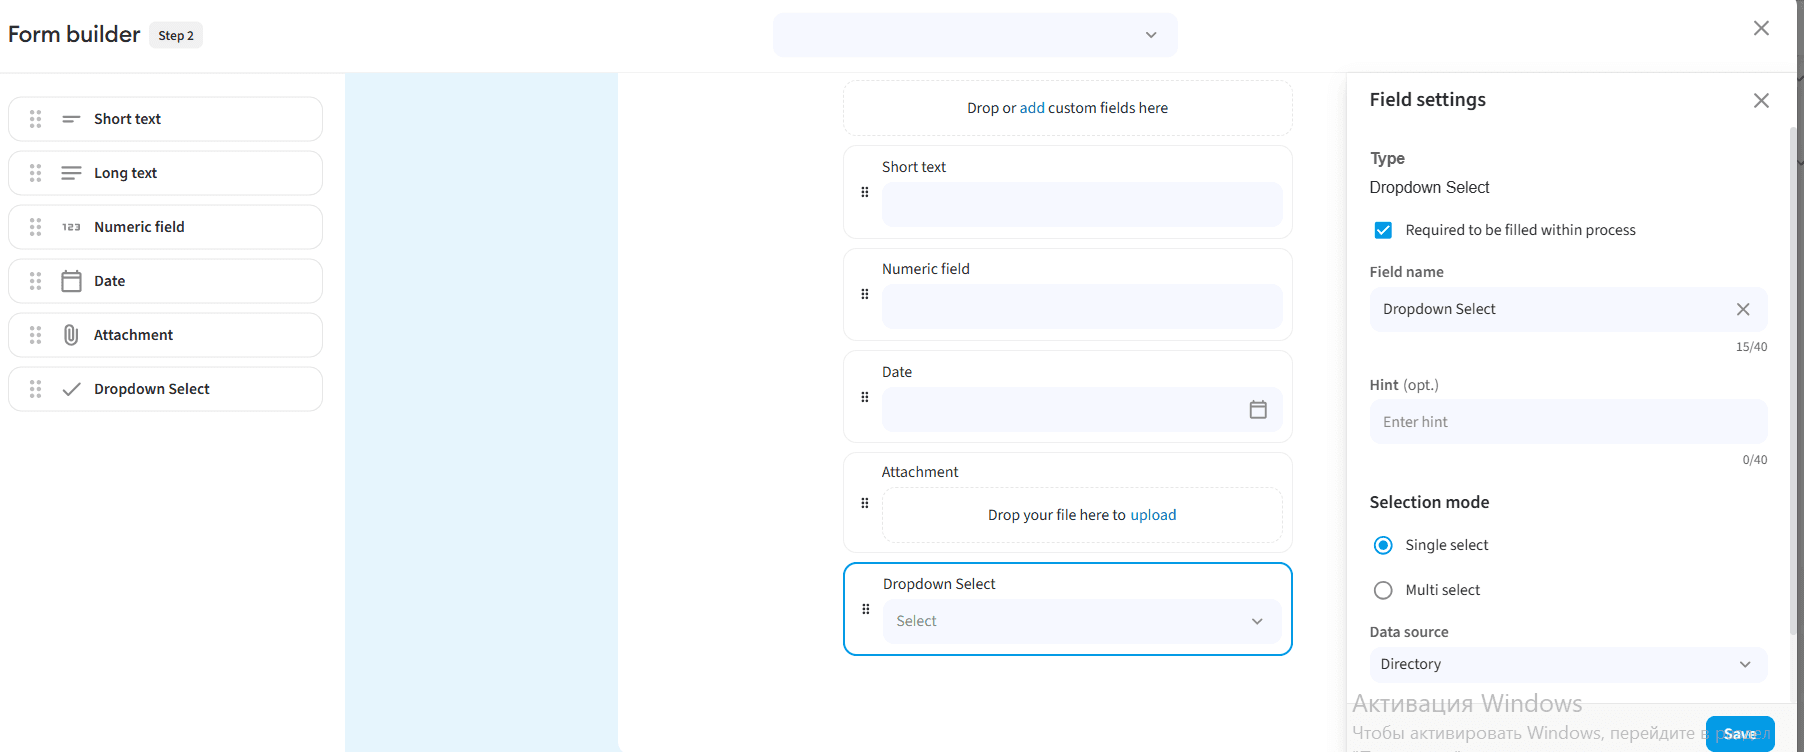
Click the Edit step form button to open the "Form Designer". Drag elements from the left panel or click the Add custom field here button:
- Short text — a text string (up to 150 characters).
- Long text — an expanded text field (up to 1000 characters).
- Number — a field for entering numerical values.
- Date — a field with a calendar to select a date in dd.mm.yyyy format.
- Attachment — a field for uploading documents or using templates (maximum of 10 files).
- Dropdown list — selecting values from system directories. When configuring, specify the selection mode (single or multiple), as well as the data source and the specific directory.
For each field, make sure to specify the Field name, add a short description in the Tooltip field, and configure the Required field toggle. Click Save to confirm changes. If necessary, a field can be deleted using the Delete field button.
5b. Configuring visibility in the subsequent stages
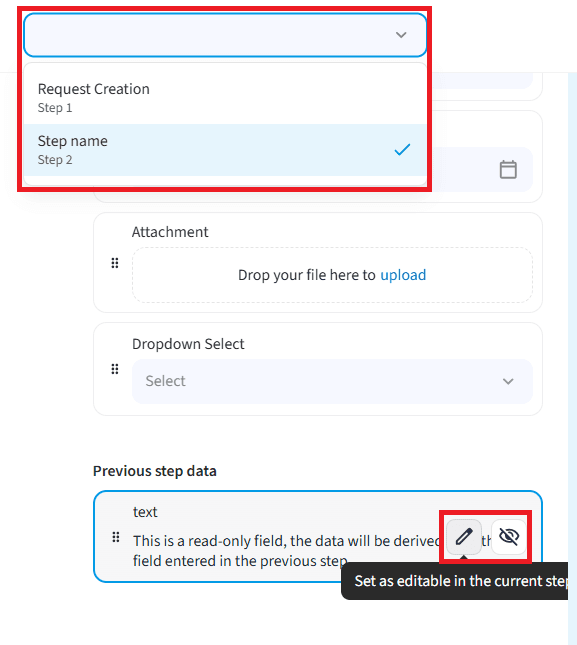
On all subsequent steps of the process, select the form field and set its accessibility mode for the current performer:
- Editable — the user at this step can change or enter data into the field.
- Hidden — the field is completely hidden from the user's view at the selected step.
Step 6 — Set additional parameters
Performed by: User with process management access
Advanced management tools are available while working in the designer:
-
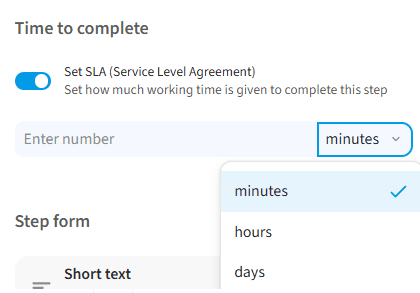
SLA (Deadlines) configuration: on user steps, enable the corresponding toggle, enter the numerical SLA value, and select the unit of measurement (minutes, hours, days).
-
Performer enable the “Enable performer selection by assignee” option — this will automatically add a user step where the performer will be selected in the previous step.
-
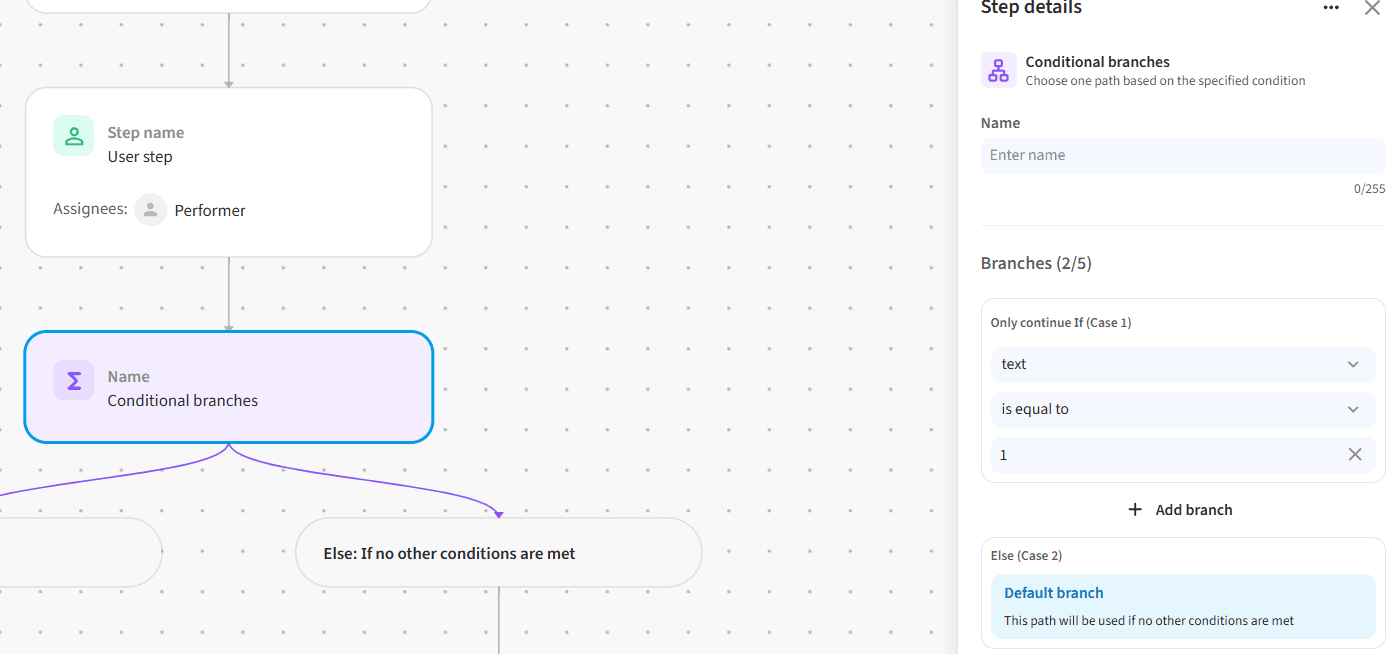
Branching configuration: on branching steps, click on a branch and add conditions by selecting the required form field, logical operator, and target value.
-
Managing diagram elements:
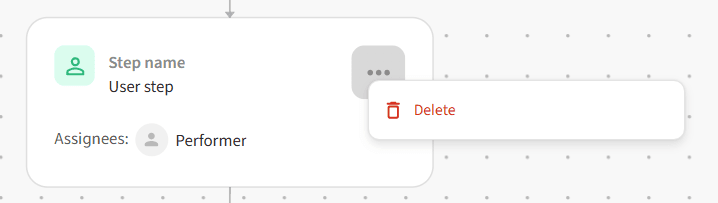
- A redundant step or branching can be deleted via the "..." → Delete button menu (confirmation required).
- You can change the layout of the diagram using the Vertical / Horizontal toggle.
- Quickly edit general parameters (name, category, color) via the Settings button.
- Completely delete an auto-saved process draft using the "..." → Delete draft button.

Step 7 — Verify and publish the process
Performed by: User with process management access
-
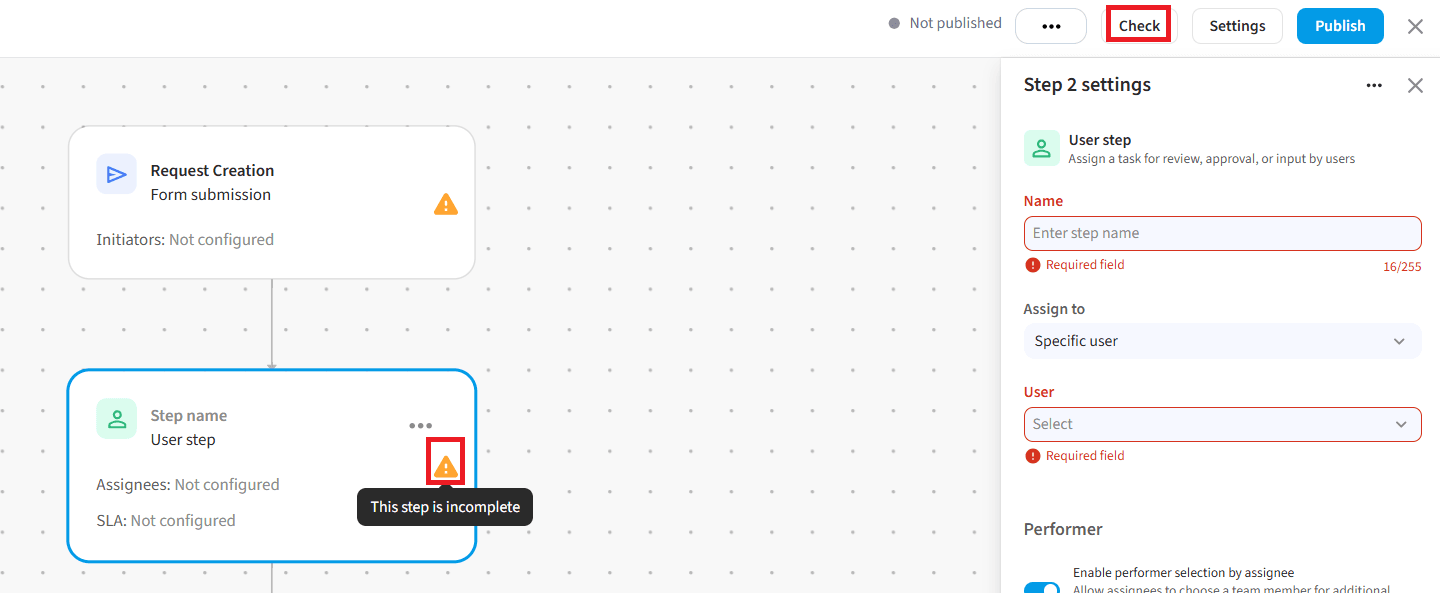
After filling in all fields, click the Check button on the top panel.
-
The system will run an automatic validation. If any incomplete settings or errors are found, those steps will be highlighted — they must be filled in before publication.
-
If the validation is successful, click the Publish button and confirm the action.
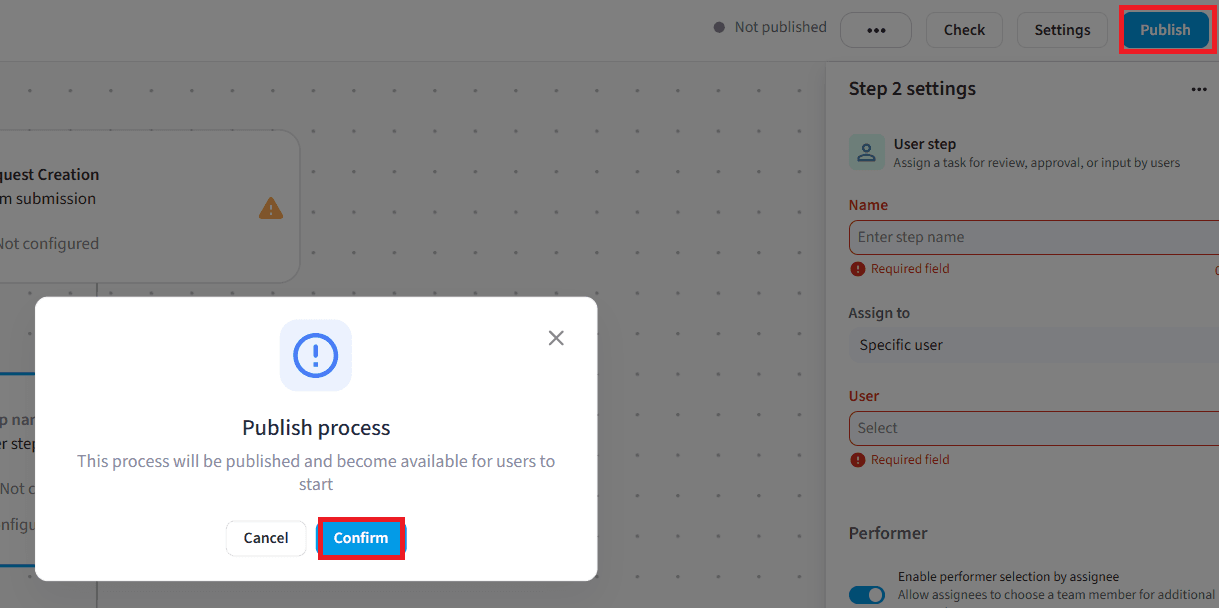
Process published — it will appear in the general "Process List" section and become available for users to create requests.