Category Management
Category management allows grouping processes by topic, helping users quickly find the requests they need.
Available for users with permissions to configure process groups.
Before you begin
Category configuration is performed by a user with the appropriate permissions in the control panel. Make sure you have the necessary permission:
| Who | What is needed |
|---|---|
| User with group configuration access | "Group Configuration" permission + access to the "Categories" section |
Steps Overview
- Step 1 — Open the "Categories" tab and configure the list display
- Step 2 — Create a new category
- Step 3 — Save and publish the category
- Step 4 — Open the "..." action menu to work with an existing category
- Step 5 — Select and perform the required additional action
Step 1 — Open the "Categories" tab and configure the list display
Performed by: User with group configuration access
- Go to the Processes section.
- In the side menu, select Categories.
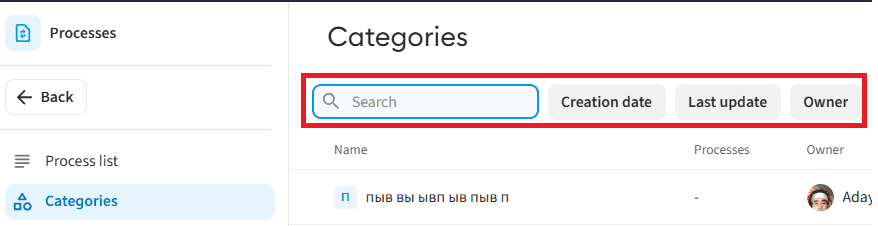
In this window, the following options are available for working with the list:
- Previously created categories are displayed in a hierarchical order under the "Processes" -> "Categories" tab.
- To search for categories, enter a value in the "Search" field.
- To filter categories, select a value in the available filters:
- Creation date — filtering by the period or date of category creation.
- Last updated — filtering by the period or date of category update.
- Owner — filtering by one or more category owners.
Step 2 — Fill in the parameters of the new category
Performed by: User with group configuration access
-
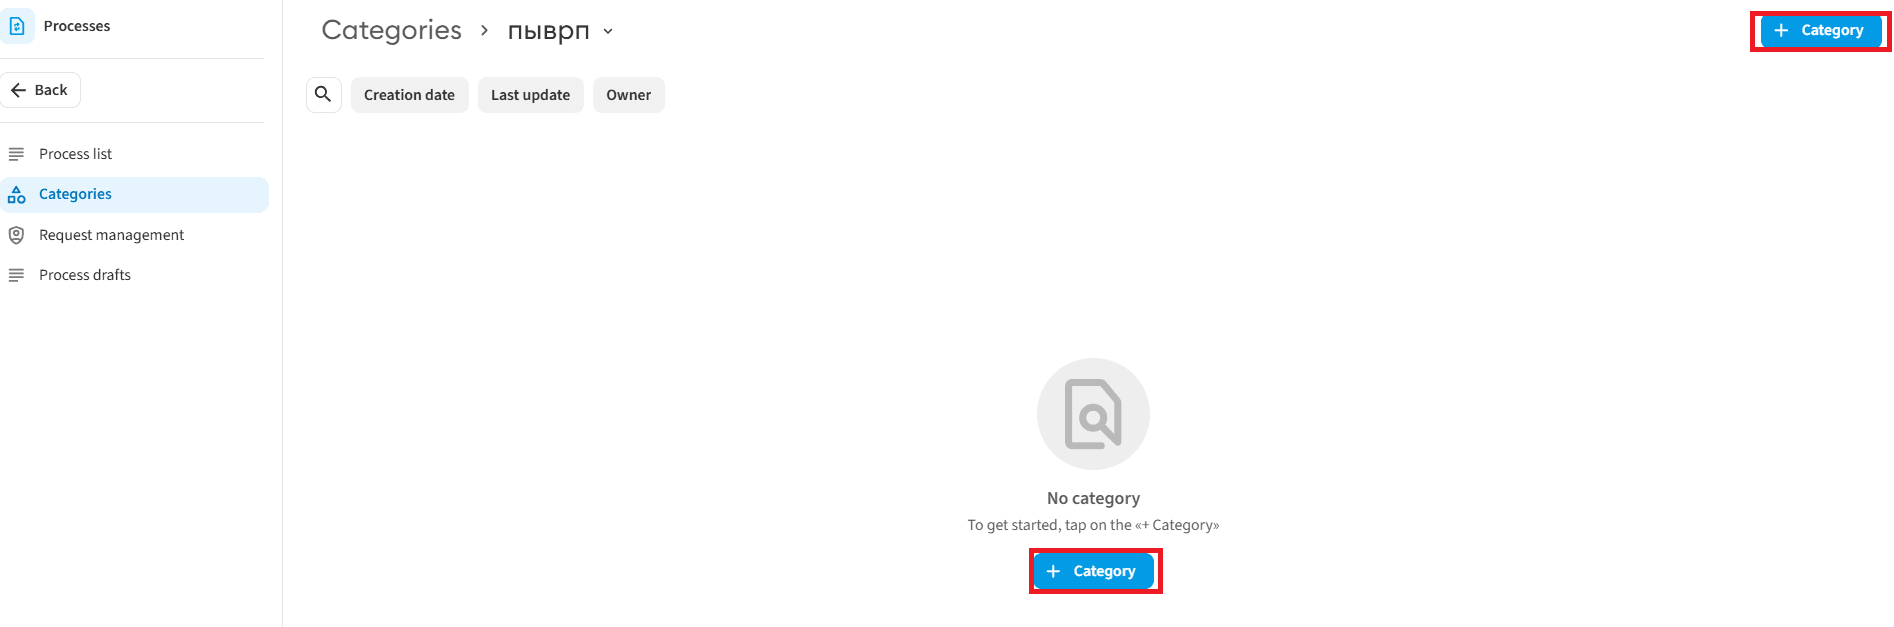
Click on the + Category button.
-
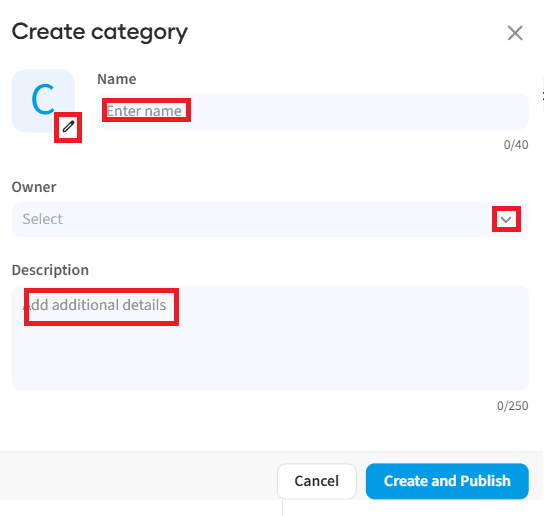
In the opened "Create Category" window, configure the parameters:
- Icon and color — choose the visual styling of the folder (optional).
- Name — enter the category name (required field).
- Owner — select the category owner from the directory.
- Description — add a description for the category.
Step 3 — Save and publish the category
Performed by: User with group configuration access
- After filling in all the data, click the Create and publish button.
Category created — the new category will immediately appear in the general list and become available when linking processes.
Cancel actions — if you click the Cancel button, the system will return you to the previous window without saving the settings.
Step 4 — Open the "..." action menu
Performed by: User with group configuration access
If you need to change, move, or delete an existing folder:
- Find the required category in the general hierarchical list.
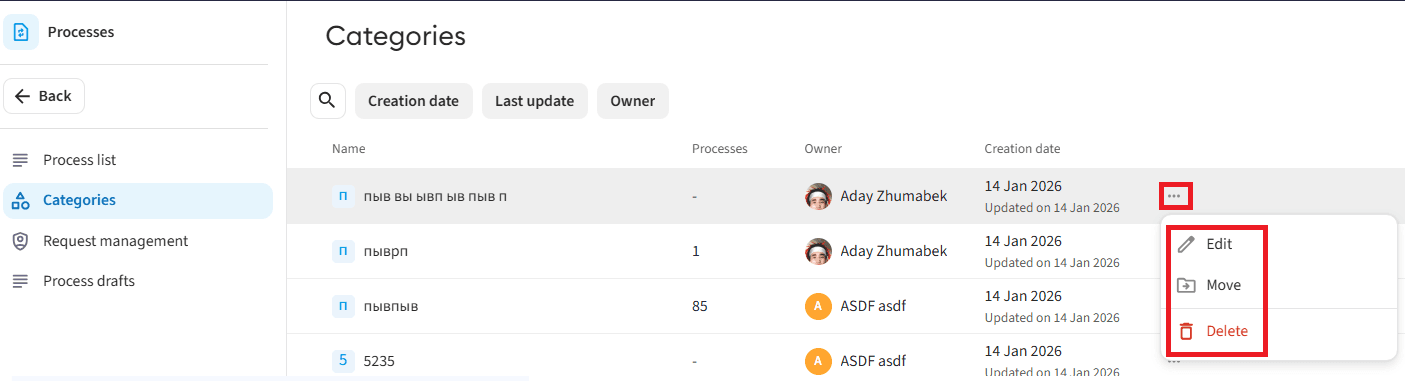
- On the right side of the row, click the "..." (three dots) button.
Step 5 — Select and perform the required action
Performed by: User with group configuration access
Depending on your current task, select one of the three options from the drop-down menu:
Editing the category
- Click the Edit button.
- In the "Edit Category" window, modify any data: icon, color, name, owner, or description.
- Click the Save and publish button to apply changes (or Cancel to exit without saving).
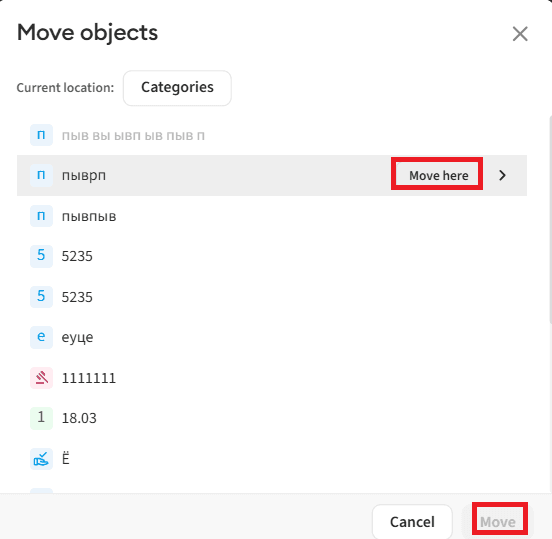
Moving the category
- Click the Move button.
- In the opened "Move Objects" object tree, click to select the primary parent category into which you want to transfer the current folder.
- Click the Move here or Move button.
Deleting the category
- Click the Delete button.
- In the confirmation window, review the notification: “This category will be permanently deleted”.
- Click the red Delete button to confirm the action (or Cancel/Close if clicked accidentally).