Request Management
The "Request Management" section is intended for system administrators. It allows monitoring all processes launched in the BPM module, tracking their current state, configuring the layout of worklists, and promptly changing assignees at specific steps if necessary.
Available for BPM module administrators.
Before you begin
All actions related to monitoring and reassigning tasks are performed in the control panel. Make sure you have the appropriate access level:
| Who | What is needed |
|---|---|
| BPM Administrator | Access to the administrator section |
Steps Overview
- Step 1 — Open the "Request Management" section and configure the list
- Step 2 — Open the selected request to view its history and route
- Step 3 — Change the current assignee (if necessary)
Step 1 — Open the "Request Management" section and configure the list
Performed by: BPM Administrator
- Go to the Processes tab.
- In the side menu, select Request Management — all processes launched in the system available to the administrator for monitoring are displayed here.
- To customize the table layout, click the Columns button and select the parameters you want to see on the screen.
- To find the required process, enter a keyword in the Search field.
- For precise filtering of requests, select values in the available filters:
- Priority — sorting by request priority.
- Status — selection by the current state of the request on its route.
- Assignee — searching by the current performer who is currently reviewing the task.
- Process — filtering by one or more specific types of processes.
- Category — sorting by one or more process categories.
- Start date — filtering by the date or period when the request was launched.
- Initiator — selection by the authors who launched these requests.

Step 2 — Open the selected request to view its history
Performed by: BPM Administrator
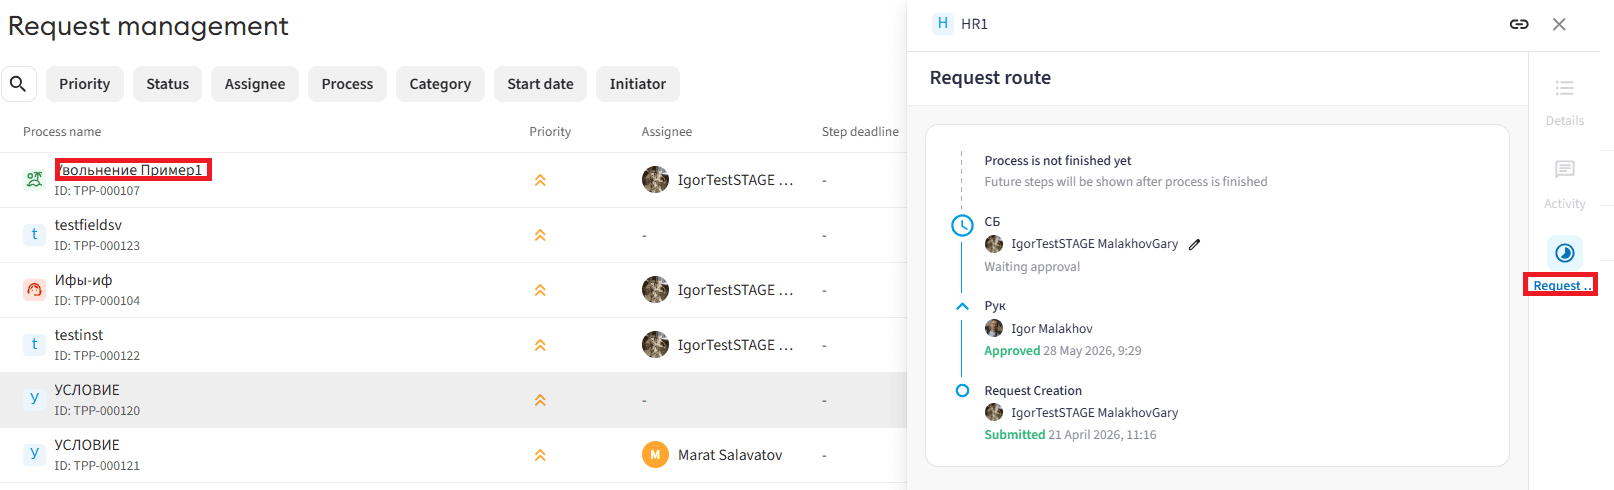
- Find the required entry in the list and click on the selected request.
- The "Request route" tab will automatically open on the screen, displaying the request movement history, completed stages, comments, and the current step.
Step 3 — Change the current assignee
Performed by: BPM Administrator
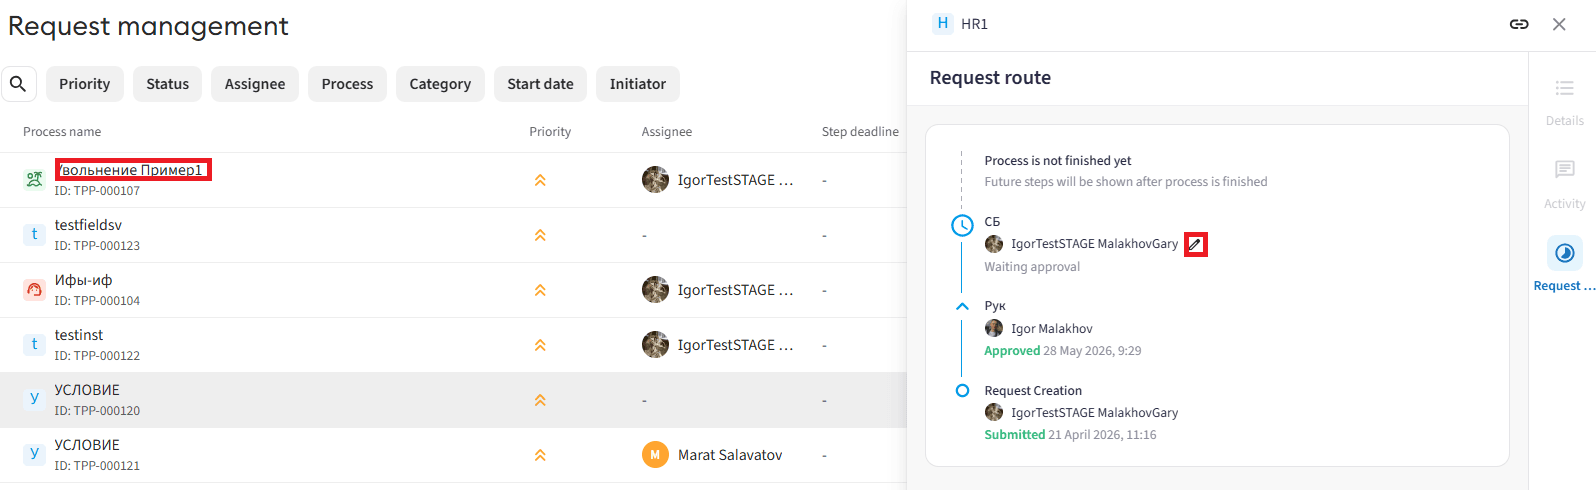
The action to replace the responsible employee is only available for requests currently in the "In Progress" status. After the replacement is made, the request will be automatically redirected to the new assignee for approval.
-
While in the request history tab, click the Edit button.
-
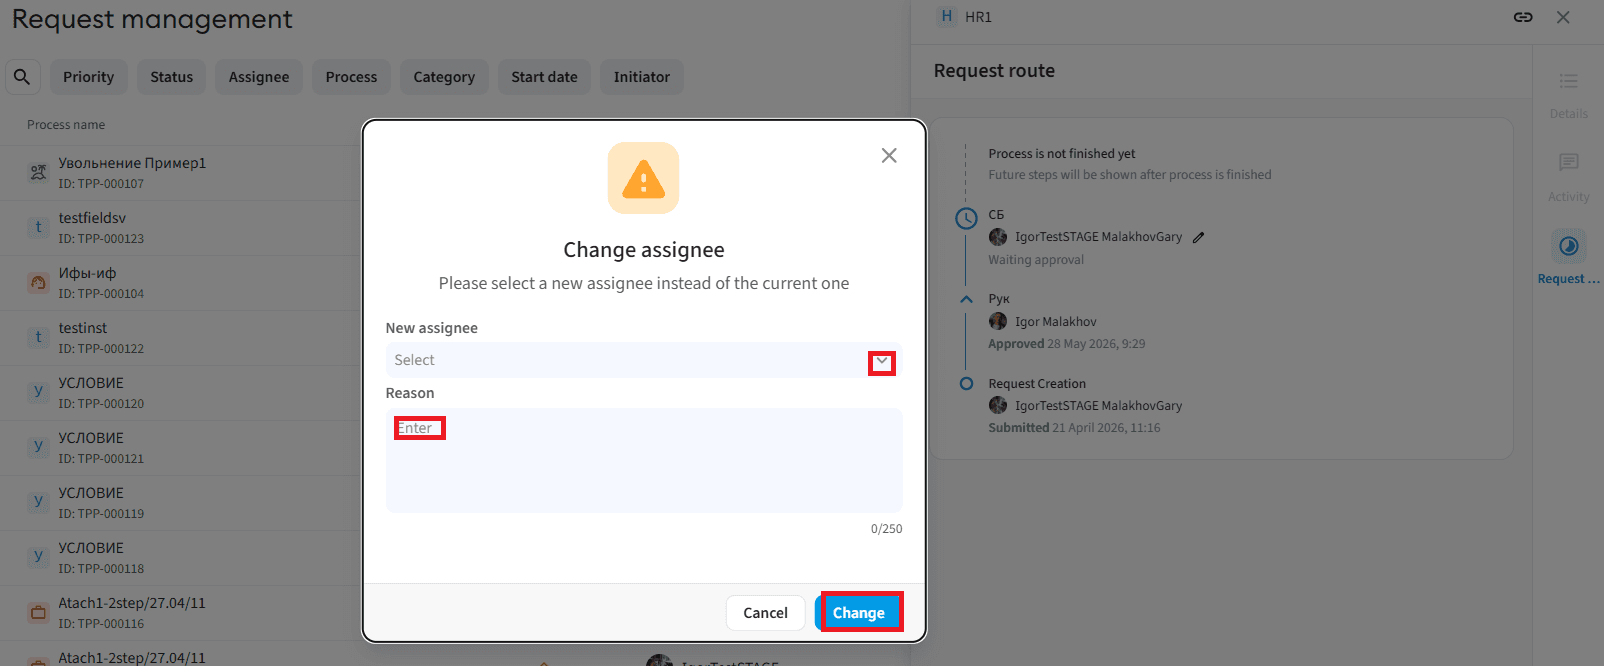
In the opened "Change Assignee" modal window, specify the following data:
- New Assignee — select the required employee from the system user directory.
- Reason — make sure to fill in the field justifying the change of assignee (limit — up to 250 characters).
-
Click the Change button to finalize the changes and transfer the task to the new employee.
-
To cancel the changes, click the Cancel button or close the window by clicking the cross icon (Close) — the system will return you to the previous window without saving the settings.