Launching a Request
The "Requests" section allows users to independently initiate new processes, fill out screen forms, attach accompanying documents, and send requests for approval along established routes.
Available for all registered users in accordance with their access rights to process templates.
Steps Overview
- Step 1 — Proceed to launch a new request
- Step 2 — Select a process template and view its structure
- Step 3 — Fill in parameters and form fields
- Step 4 — Review summary information in the resume and send the request
Step 1 — Proceed to launch a new request
- Go to the main Requests section.
- Click the + Request button to initiate a new process.

Step 2 — Select a process template
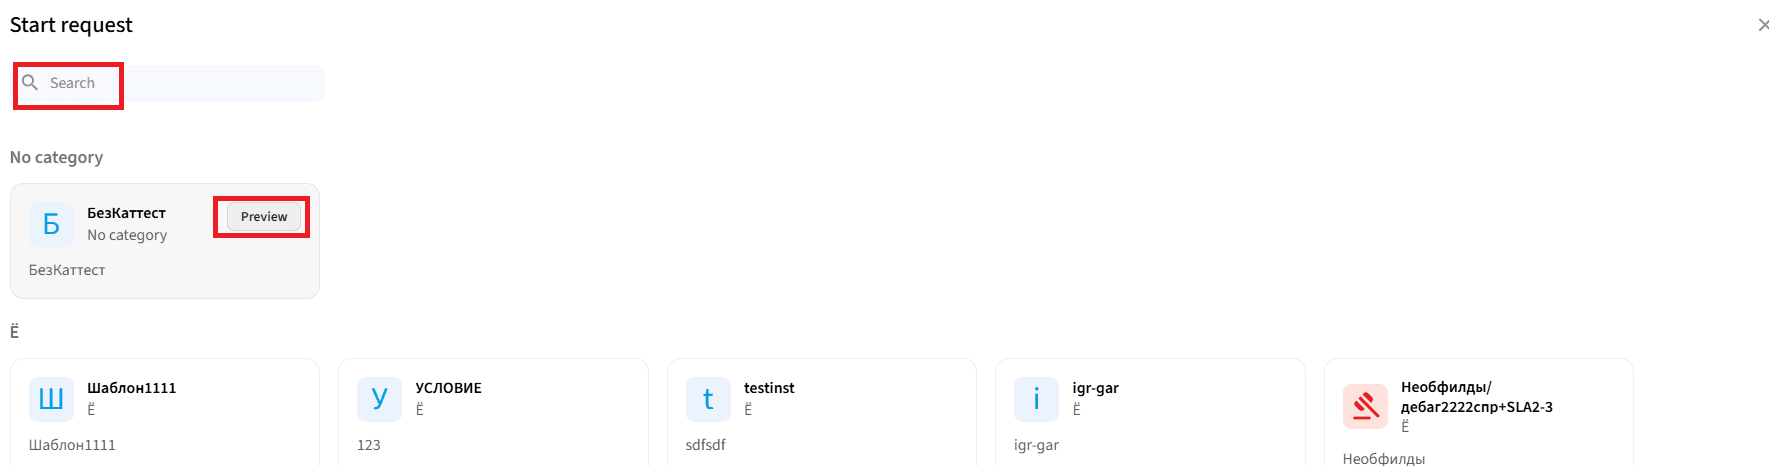
In the opened "Launch Request" window, a list of all process templates available to you, distributed by thematic categories, will be displayed.
-
For a quick search of the required regulation, enter a keyword in the Search field.
-
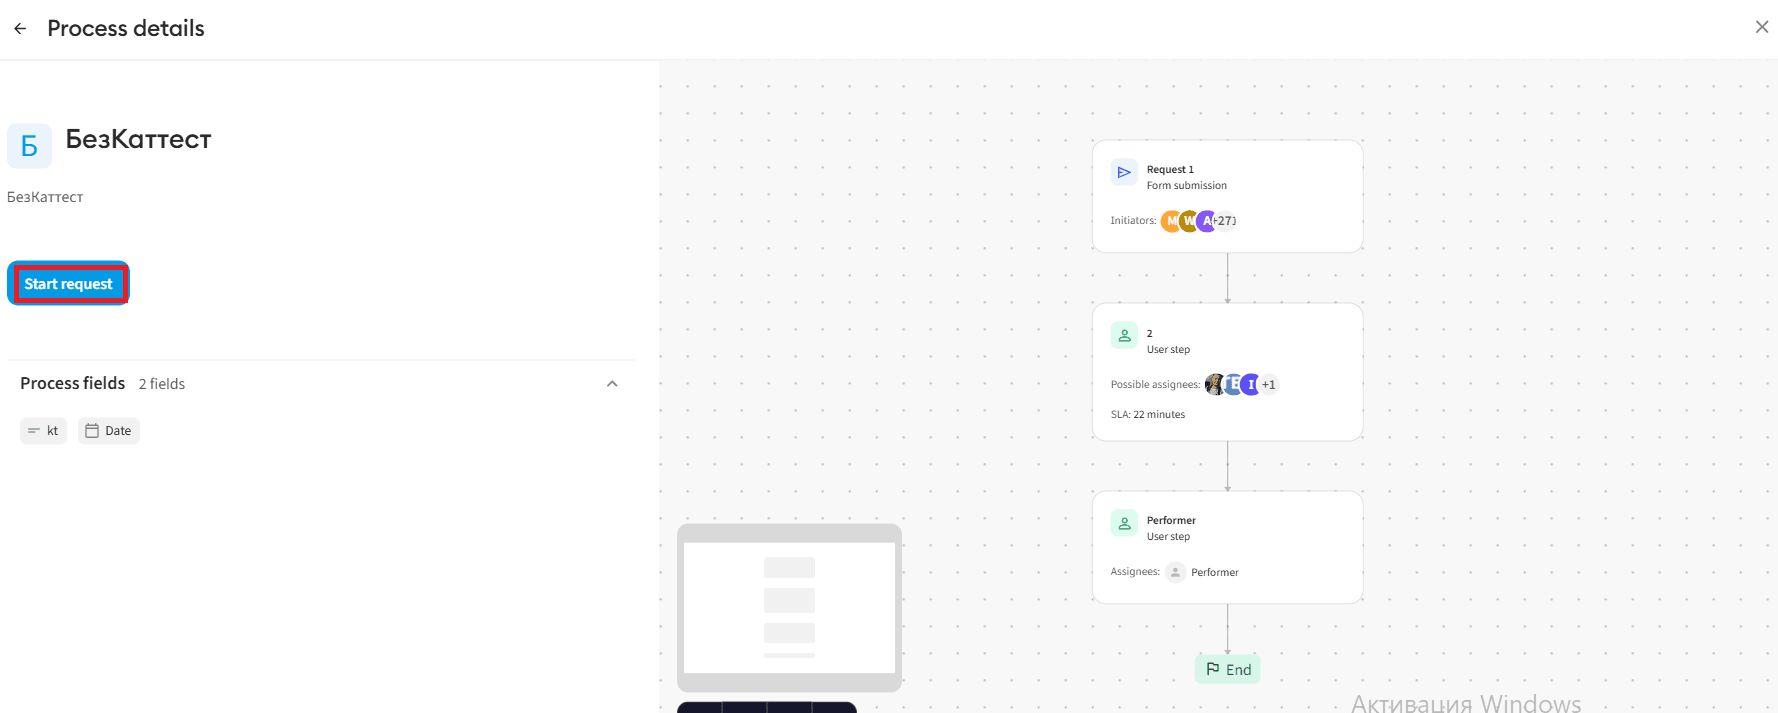
To familiarize yourself with the process structure in advance, click the Preview button — the system will display the fields of the future form and the detailed approval route.
-
To proceed to formatting, click on the name of the required request in the general list or click the Start Request button inside the preview mode.
Step 3 — Fill in parameters and form fields
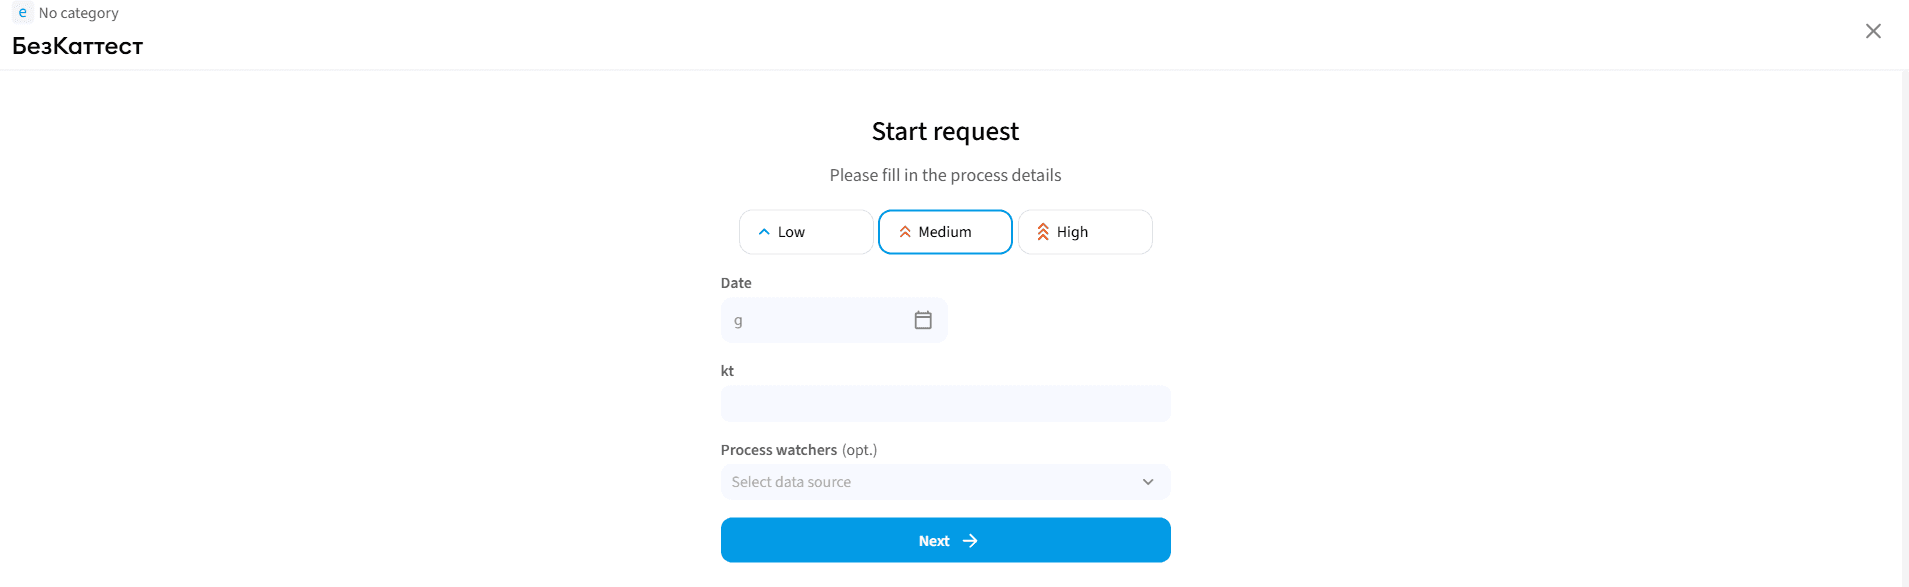
In the opened request creation window, sequentially specify all necessary data:
- Specify the request priority (select the importance level from the proposed options).
- Fill in the required fields on the form (text, numeric fields, directories, or dates).
- Upload documents for fields with the "Attachment" type (drag files or select them from the device).
- Add observers in the "Process Observer" field (optional) — specified users will be able to track the request status without the right to approve it.
- After checking all entered data, click the Next button.
Step 4 — Review summary information in the resume
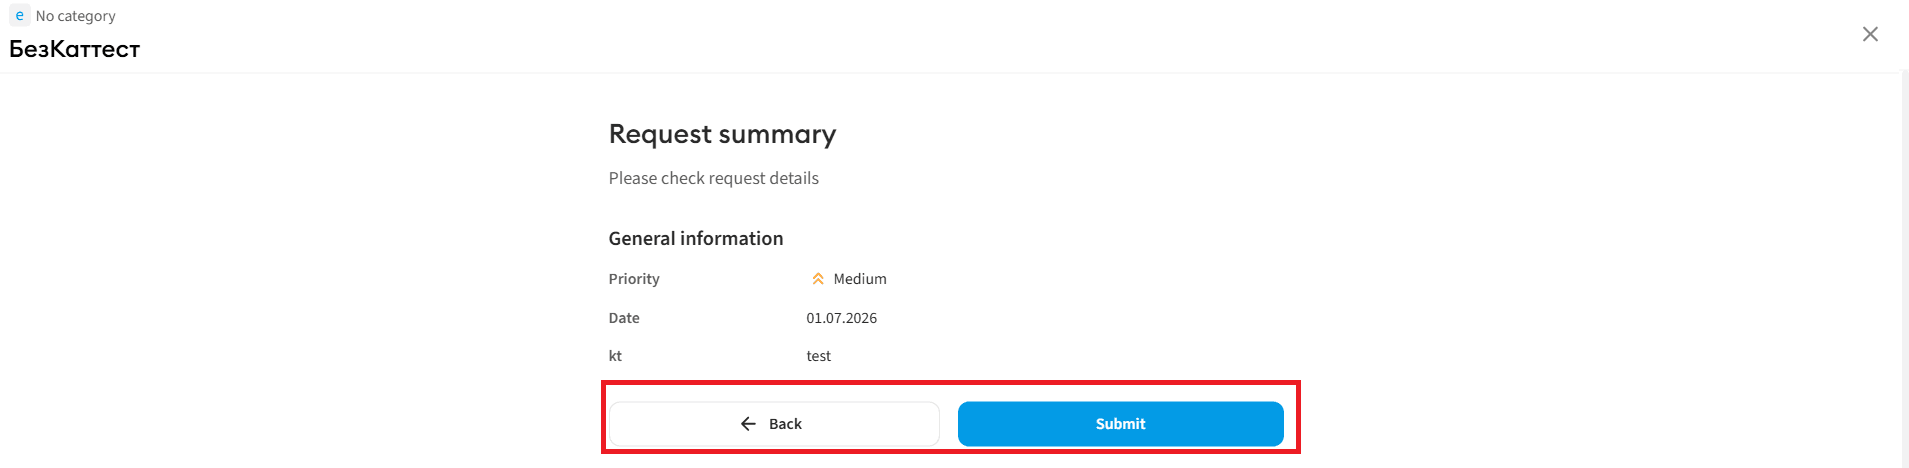
The "Request Summary" window will open on the screen, containing a full summary of all the fields you have filled out. Before sending, the following actions are available to you:
-
"Back" button — allows you to go back one step and edit the entered data.
-
"Send" button — launches the process and routes the request for approval to the first assignee on the route.
-
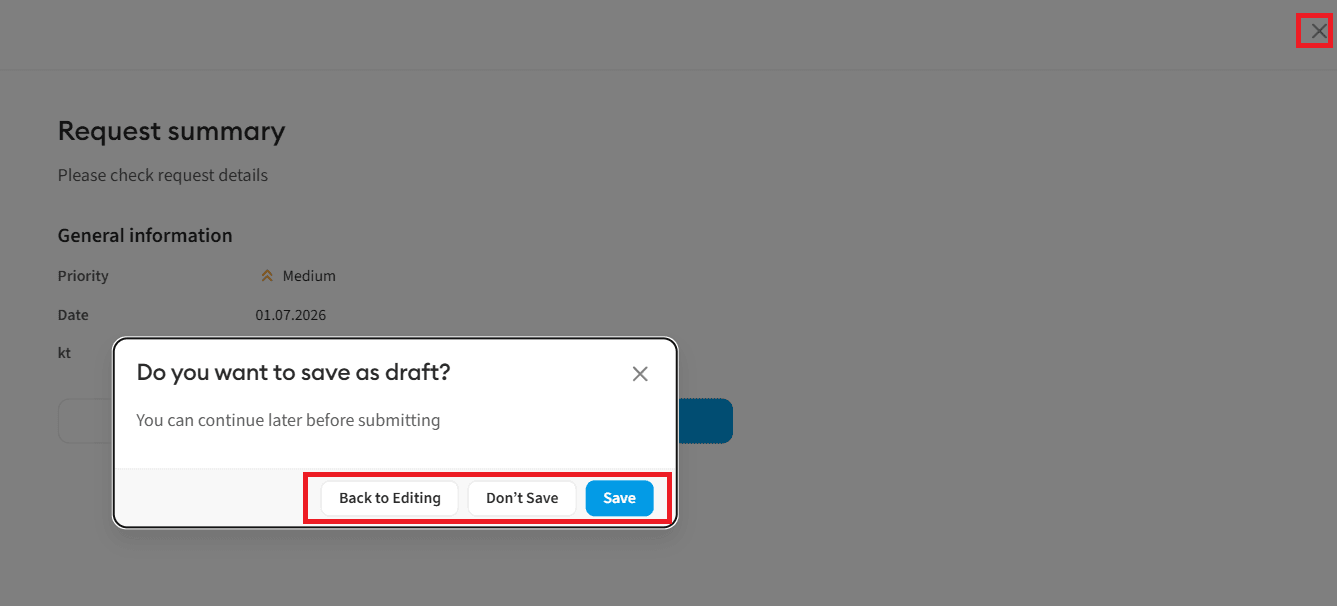
"Close" button — interrupts the current work session. Upon clicking, the system will display a modal window where you must select one of the options:
- “Back to editing” — closes the warning and returns you back to filling out the form without data loss.
- “Do not save” — closes the window and completely deletes the request.
- “Save” — interrupts sending but saves the request to the "Drafts" tab so you can finish it later.
After clicking the "Send" button, the request will be successfully launched into the system and will instantly appear in the "Sent by me" tab.